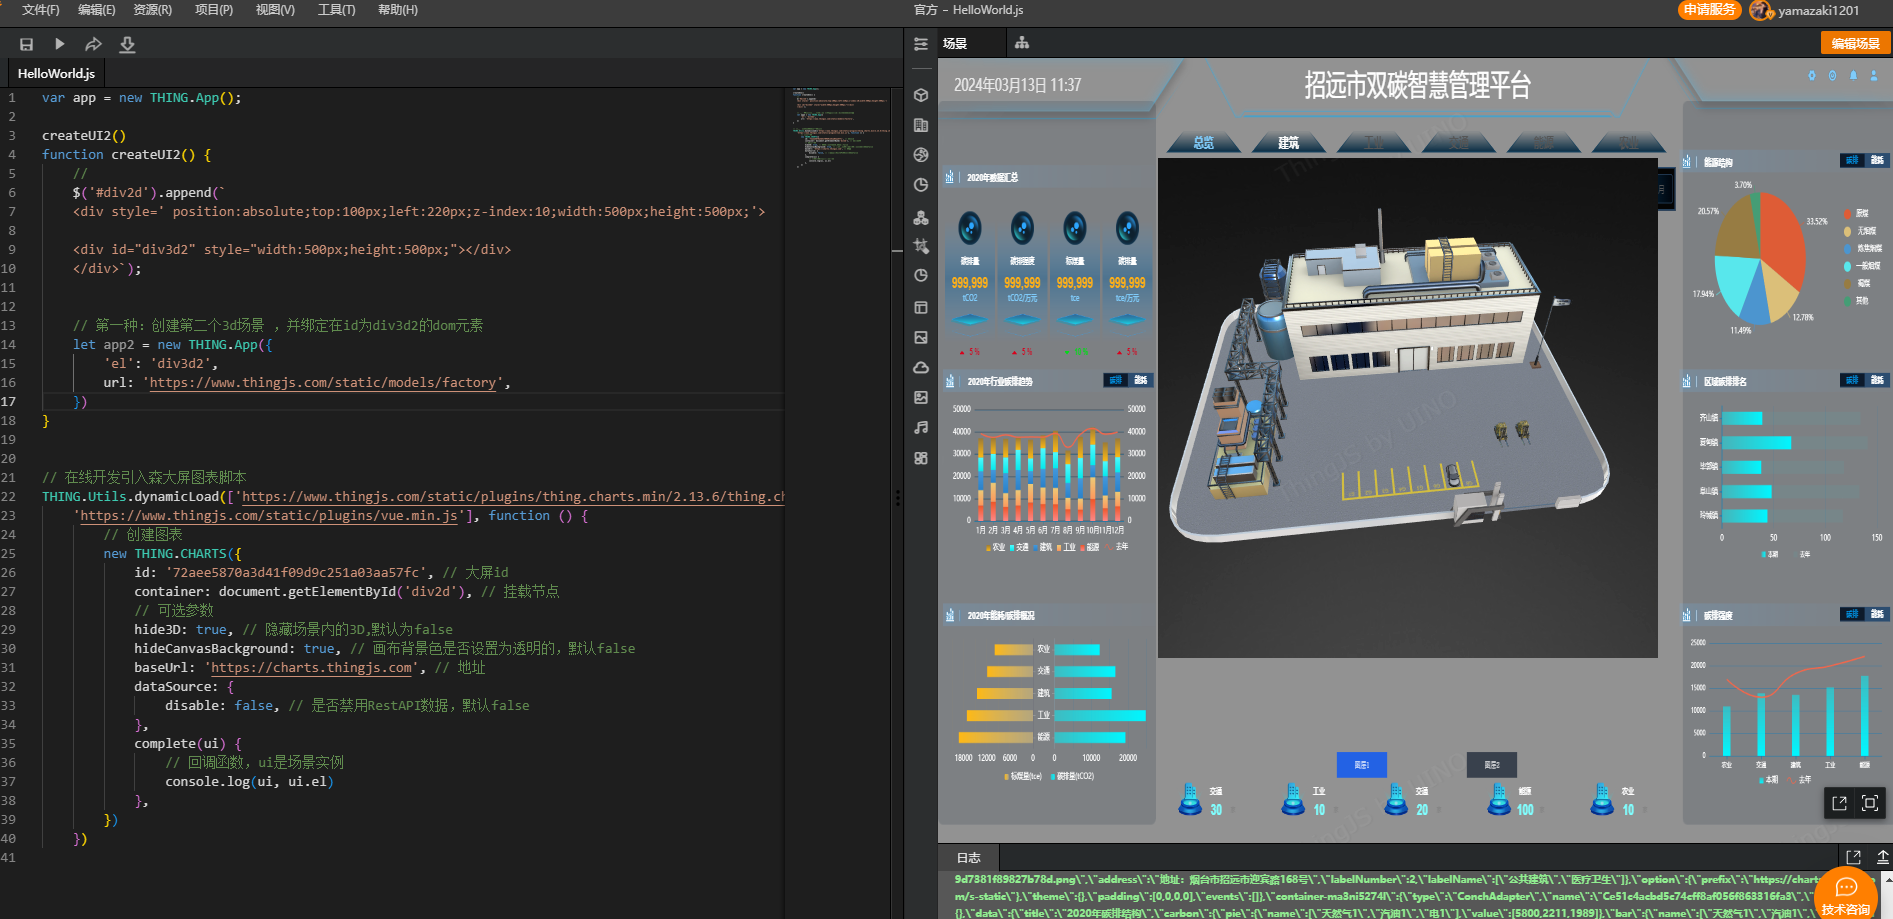
最终效果图:

实现过程:
1.理解创建两个App对象:
地址:https://developer.thingjs.com/forum.php?mod=viewthread&tid=2255&page=1&extra=#pid4004
2.修改外面App对象为空场景
实现代码:
- var app = new THING.App();
- createUI2()
- function createUI2() {
- //
- $('#div2d').append(`
- <div style=' position:absolute;top:100px;left:220px;z-index:10;width:500px;height:500px;'>
- <div id="div3d2" style="width:500px;height:500px;"></div>
- </div>`);
- // 第一种:创建第二个3d场景 ,并绑定在id为div3d2的dom元素
- let app2 = new THING.App({
- 'el': 'div3d2',
- url: 'https://www.thingjs.com/static/models/factory',
- })
- }
- // 在线开发引入森大屏图表脚本
- THING.Utils.dynamicLoad(['https://www.thingjs.com/static/plugins/thing.charts.min/2.13.6/thing.charts.min.js',
- 'https://www.thingjs.com/static/plugins/vue.min.js'], function () {
- // 创建图表
- new THING.CHARTS({
- id: '72aee5870a3d41f09d9c251a03aa57fc', // 大屏id
- container: document.getElementById('div2d'), // 挂载节点
- // 可选参数
- hide3D: true, // 隐藏场景内的3D,默认为false
- hideCanvasBackground: true, // 画布背景色是否设置为透明的,默认false
- baseUrl: 'https://charts.thingjs.com', // 地址
- dataSource: {
- disable: false, // 是否禁用RestAPI数据,默认false
- },
- complete(ui) {
- // 回调函数,ui是场景实例
- console.log(ui, ui.el)
- },
- })
- })
|
|
|
|
|
|
|
|
|
|